.png)

.svg)
.svg)
.svg)
Wish you could revisit a Google meet to catch something you missed?
Recording Google Meet sessions ensure you never lose key information. But who can record, and how?
This article will talk about everything you need to know on how to record Google Meets.
Can You Record a Google Meet Event?
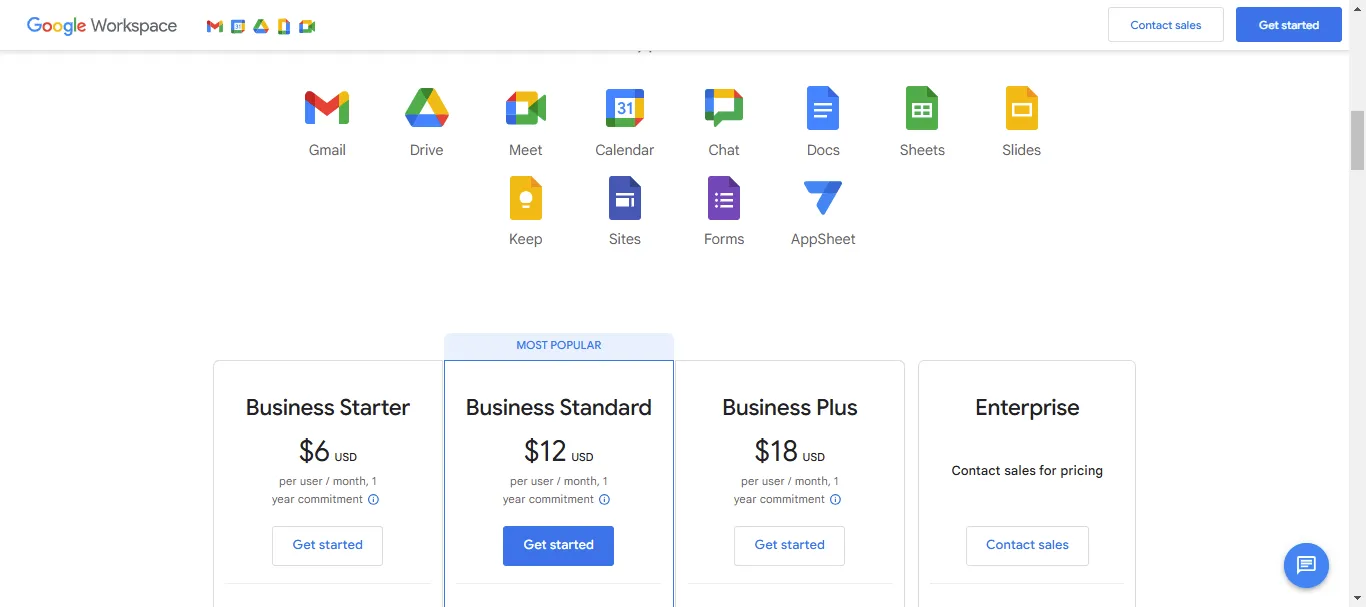
Yes, you can record a Google Meet event, but it depends on your account type. The built-in recording feature is only available for certain Google Workspace editions.
Account Types That Can Record Google Meet:
- Business Plus
- Business Standard
- Essentials
- Education Plus. This is available to users with a "Staff" or "Student" license.
- Enterprise Essentials
- Enterprise Plus
- Enterprise Standard
- Enterprise Starter
- Google One subscribers with 2 TB or more storage space
- Teaching and Learning Upgrade. This is available to users with a “Teaching and Learning Upgrade” license.
- Workspace Individual Subscriber
If you're using a free Google account, recording isn’t an option. However, if you have one of the Workspace accounts listed above, you can record meetings without much hassle.
Why Record Your Google Meet Sessions?
Recording your Google Meet sessions is crucial for many situations:
- Whether you're running a training session for new hires or presenting a detailed client proposal, recording ensures that all information is saved and accessible later.
- Your team can revisit important discussions whenever they need to, which saves time and prevents misunderstandings.
- Recording also helps during brainstorming sessions or interviews. Instead of scrambling to take notes, you can focus on the conversation.
- You can review the recording later to ensure you didn’t miss any key points or ideas.
Who Can Record a Google Meet?
Not everyone can record a Google Meet. The ability to record is restricted to specific roles and account types. Here’s what you need to know:
Roles Allowed to Record
- Meeting Organizer: Must be the person who set up the meeting.
- Participants in the Same Organization: Only those within the same Google Workspace organization as the organizer can record.
Educational Settings
- Teachers: Teachers using Google Workspace for Education can record meetings, but this feature is typically controlled by the school’s administrator.
- Students: Students cannot record meetings unless they receive explicit permission from the teacher or administrator. This restriction helps protect student privacy and maintains a secure learning environment.
Permissions and Notifications:
- Initiating the Recording: Only the meeting organizer or someone in the same organization can start a recording. Participants from outside the organization cannot start or stop the recording.
- Notifications: All participants are notified when a recording starts. This ensures transparency, as everyone is aware that their audio, video, and shared content are being recorded.
How to Record Google Meet on a Laptop/PC?
Recording a Google Meet session on your laptop or PC is simple if you have the right tools and permissions :
Step 1: Join the Google Meet Session
Join the Google Meet event that you want to record. Make sure you have the necessary permissions to record. Remember, if you’re using a personal Google account or don’t have the right Google Workspace edition, you won’t see the recording option.
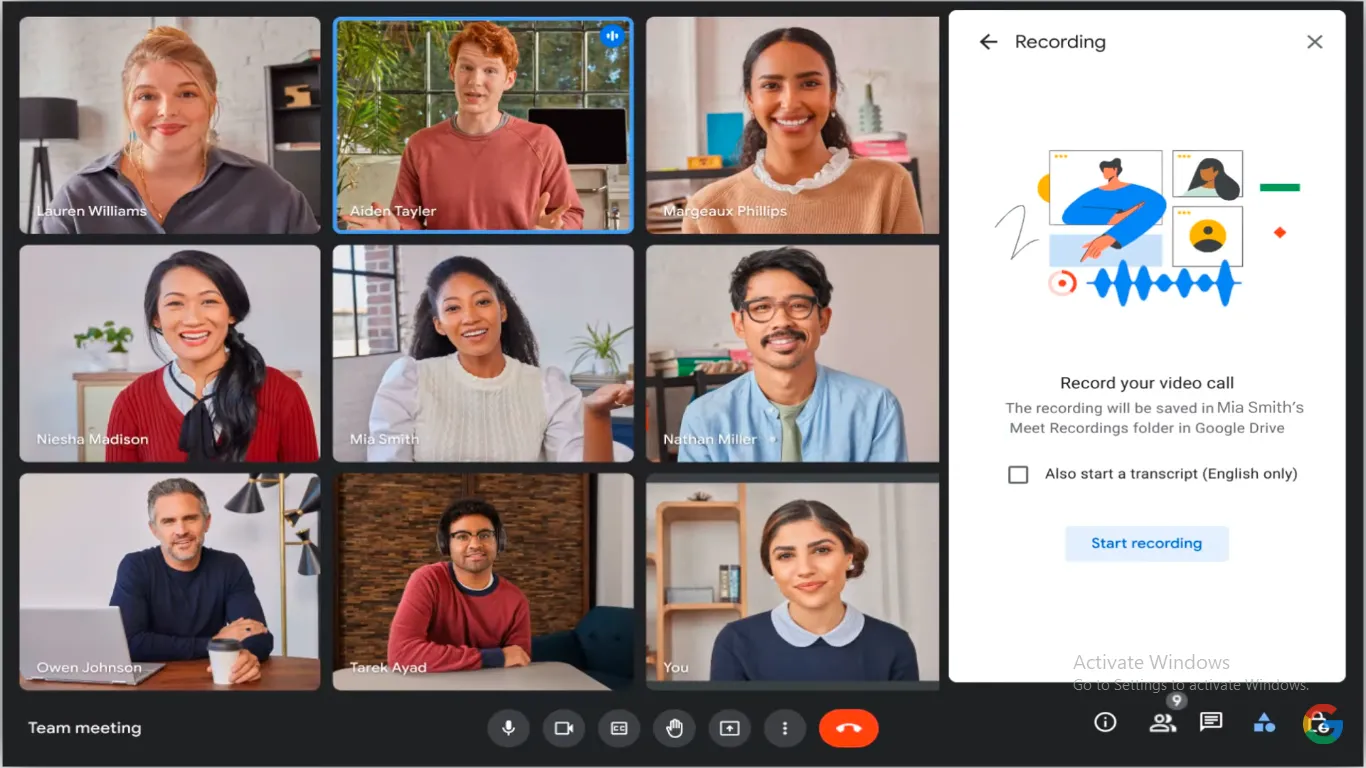
Step 2: Start Recording
Once you’re in the meeting, look to the bottom right corner of your screen and click on Activities.
From the menu that pops up, select “Recording.” You’ll see a prompt asking you to confirm. Click “Start Recording” to begin recording. All participants will receive a notification that the meeting is being recorded.
Step 3: Stop the Recording
When the meeting is over, or you’ve captured everything you need, it’s time to stop the recording. Again, click the Activities > Recording > Stop recording. Google will ask for confirmation, and once confirmed, the recording will stop.
PS: It’s important to note that recordings don’t save instantly; they take a few minutes to process.
Accessing Your Recordings
After you’ve finished recording, Google Meet saves the video file directly to the meeting organizer's Google Drive under “My Drive” in a folder called “Meet Recordings.” You will also receive an email with a link to the recording once it’s ready. This makes it easy to share the meeting with others who couldn’t attend or to revisit important points at a later date.
How to Record Google Meet from Your Phone?
The Google Meet mobile app doesn’t have a direct recording feature, which means you need to use alternative methods to capture your meetings. Here’s how you can do it, whether you’re using an Android or iPhone.
Recording on Android
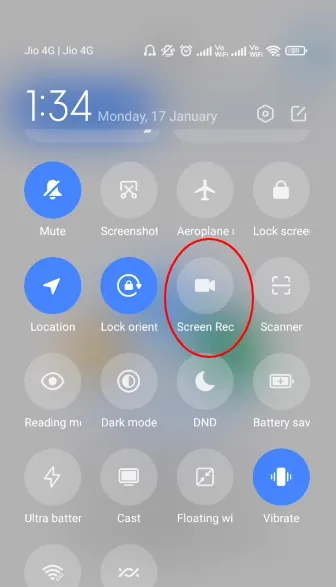
You can easily record a Google Meet session on an Android device using the built-in Screen Recorder feature. Here’s how to do it:
- Open Quick Settings: Swipe down from the top of your screen to access Quick Settings, then select Screen Recorder.
- Set Recording Options: Choose the audio and video recording settings you prefer. Make sure to select both internal and microphone audio if you want to capture the entire conversation. Tap Done to confirm your settings.
- Grant Permissions: If prompted, accept the screen recorder's request for access to your device.
- Start Recording: Tap Start Recording. The screen recorder will begin capturing everything on your device, including the Google Meet session.
- Stop Recording: Once the meeting ends, tap the red recording icon on your screen to stop the recording. The recording will be saved in your device's Gallery for easy access and sharing.
Recording on iPhone
If you’re using an iPhone, you can use the built-in iOS Screen Recording feature to capture your Google Meet sessions. Here’s how:
- Enable Screen Recording: Go to your phone’s Settings, then Control Center, and add Screen Recording to your control options.
- Start Recording: Open Google Meet and join your meeting. Swipe down to access the Control Center and tap the Screen Recording button. After a three-second countdown, your phone will start recording both the video and audio.
- Stop Recording: Once the meeting is finished, tap the red status bar at the top of your screen and select Stop. The recording will be saved to your Photos app.
How to Record Your Google Meet from Any Device?
Recording your Google Meet sessions is possible on any device if you use the right third-party software.
Here’s how you can get it done smoothly :
Use Cloud-Based Recording Tools
One of the best ways to record your Google Meet sessions on any Windows or Mac device, or even mobile device, is to use cloud-based tools like OBS Studio, Loom, or ScreenFlow for Mac. Let’s break down how each of these tools can help you:
- OBS Studio: This open-source software is free and supports recording your screen on virtually any device. It’s known for its flexibility, allowing you to capture both audio and video with high quality. Setting it up may seem complicated at first, but once it’s configured, you can reliably record any Google Meet session with ease.
- Loom: If you’re looking for something more user-friendly, Loom is a great choice. It works directly from your browser or as an app on your device, making it super convenient. It also provides cloud storage, so once you finish recording, your video is instantly uploaded for easy access and sharing.
- ScreenFlow for Mac: For Mac users, ScreenFlow offers advanced screen recording features along with editing tools. This can be especially useful if you want to trim, highlight, or annotate parts of your Google Meet before sharing it.
Transcriptions and Minutes in Google Meet: Noota
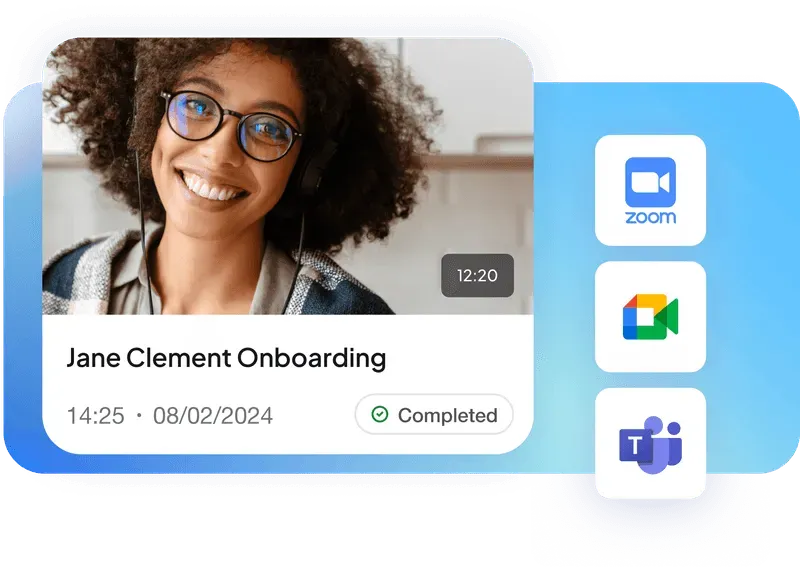
Recording your Google Meet sessions is just the beginning. The real advantage comes when you convert these recordings into actionable, searchable text. That's where Noota excels :
- Effortless Sharing: Once your meeting is transcribed, sharing the content with team members is simple. Noota provides easy sharing options, allowing everyone to stay informed, whether they attended the meeting or not. No more relying on incomplete notes or vague recollections.
- Accessing and Using Recordings: After recording your Google Meet, Noota makes accessing and using those recordings easy. Upload the recorded file to Noota, and within minutes, you'll have a full transcript that's easy to read, edit, and distribute.
- Highlight Key Moments: With Noota, you can highlight key moments in the meeting transcript. This feature allows you to mark critical points, action items, or important decisions, making it easy to revisit these moments without searching through the entire transcript.
- Integration with Tools You Already Use: Noota integrates seamlessly with popular project management and collaboration tools like Slack, Trello, and Google Drive. This means you can easily push transcripts or key points to the tools your team already uses, keeping workflows smooth and efficient.
Want to easily transcribe your Google Meet sessions and never miss a detail? Try Noota for free now.
FAQs
Why can't I record my Google Meet?
Recording might be restricted due to account limitations or lack of permission. Only certain Google Workspace editions and specific roles can record meetings.
Where do recorded Google Meets go?
Recorded sessions are saved in the meeting organizer’s Google Drive under the "Meet Recordings" folder, and a link is sent via email.
Can I record a Google Meet without others knowing?
No, Google Meet notifies all participants when recording starts, ensuring transparency and compliance with privacy regulations.
How to get high-quality Google Meet recordings?
Use a stable internet connection, quality microphone, and proper lighting for the best recording quality. Encourage participants to use headsets for clearer audio.
Can I transcribe a Google Meet without recording?
Yes, Noota offers real-time transcription, letting you capture important points live without needing to record the entire session.
.webp)


.svg)
