.png)
.svg)
.svg)
.svg)
Recording meetings on Webex can be a game-changer for your team. It ensures you have an accurate record of key discussions, decisions, and action items, which you can revisit at any time.
But if you're new to the platform, the recording process may seem confusing. Don’t worry!
This guide will walk you through how to record on Webex, so you can get the most out of your meetings!
Why Recording Webex Session Matters?
Recording Webex sessions gives you a reliable reference for your team, ensuring better productivity and communication.
Here are a few great benefits of recording Webex meetings:
- With recordings, you can refer back to critical points of the meeting. Whether it's a client call or an internal update, you’ll always have a reference to review later.
- Another key benefit is accountability. With a recorded session, you have a clear record of decisions, action items, and responsibilities. This can be crucial for follow-ups and tracking progress over time.
- It also helps with collaboration. Team members who couldn't attend can catch up on what was discussed, making sure everyone stays aligned.
- Recording Webex sessions also saves time. You won’t need to rely on handwritten notes or memory, making your workflow smoother and more efficient.
Who Can Record Webex Meetings?
In Webex meetings, the power to hit the record button is determined by the host. Here's how it works:
- Hosts: By default, only hosts can record meetings. They have the authority to start, stop, and manage recordings.
- Co-hosts: Co-hosts can record meetings only if the original host is absent. Once the host joins, they regain control over recording.
- Presenters: Presenters can share content but cannot record unless granted permission by the host.
- Attendees: Attendees cannot record meetings. They must ask the host for permission to record. If allowed, the host can share the meeting recording link after the session.
How to Record Webex Meetings as a Host?
Recording Webex sessions is quite easy once you have the right know-how!
Here’s a step-by-step guide to help you record Webex meetings:
On Computer:
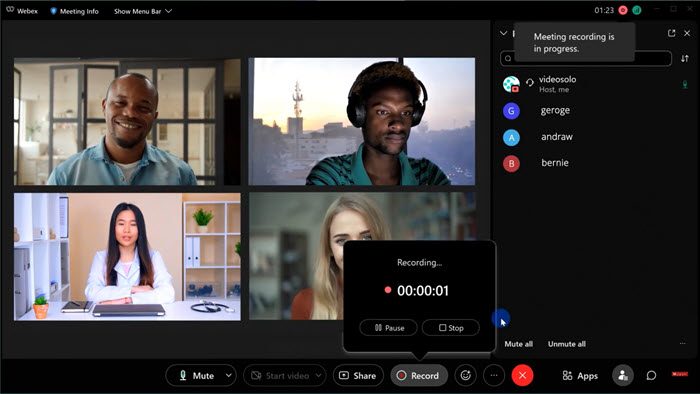
- Click the Record button: Once your Webex meeting begins, hit the “Record” button, which is usually located at the bottom right-hand corner of your screen.
- Choose a save location: If you have a paid Webex account, a prompt will appear asking where you'd like to save the recording. Pick your preferred save location - either the cloud or your computer.
- Hit the Save button: Tap “Save” to begin recording. A small popup will then appear in the bottom right corner, allowing you to pause or stop the recording.
On Phone:
- Open the Webex app: Launch the Webex app on your phone. Make sure you're signed in to your account.
- Start or Join a Meeting: Tap the “Start Meeting” button to begin your own meeting. If you’re joining an ongoing meeting, tap the “Join” button instead.
- Start Recording: Once the meeting begins, tap the “Record” button at the bottom of the screen. A notification will confirm that the recording has started.
How to Record Webex Meetings as a Participant?
As mentioned earlier, you can’t record Webex events as an attendee. But don’t worry - we’ve figured out some workarounds to help you record meeting canvas without any hassle.
These include:
1. Using Xbox Game Bar (Windows 10 & 11)
Windows users can rely on the Xbox Game Bar to record Webex meetings effortlessly. This built-in tool is primarily for gamers but works well for meetings too.
Follow these simple steps to record:
- Select the Webex meeting window you want to record.
- Press Windows + G to open the Xbox Game Bar.
- Click the “Record” button to start capturing the meeting.
Keep in mind, the recording will be saved to your Videos folder by default.
2. Using Built-in macOS Tools
If you're using a Mac, you can easily record Webex meetings through the browse:
- Open the browser or Webex app window you need to record.
- Press Command + Shift + 5 to access the screen recording menu.
- Select “Record Entire Screen” or “Record Selected Portion”.
- Click “Stop” once done. The recording will be saved to your chosen location.
3. Using Noota Extension (Recommended)
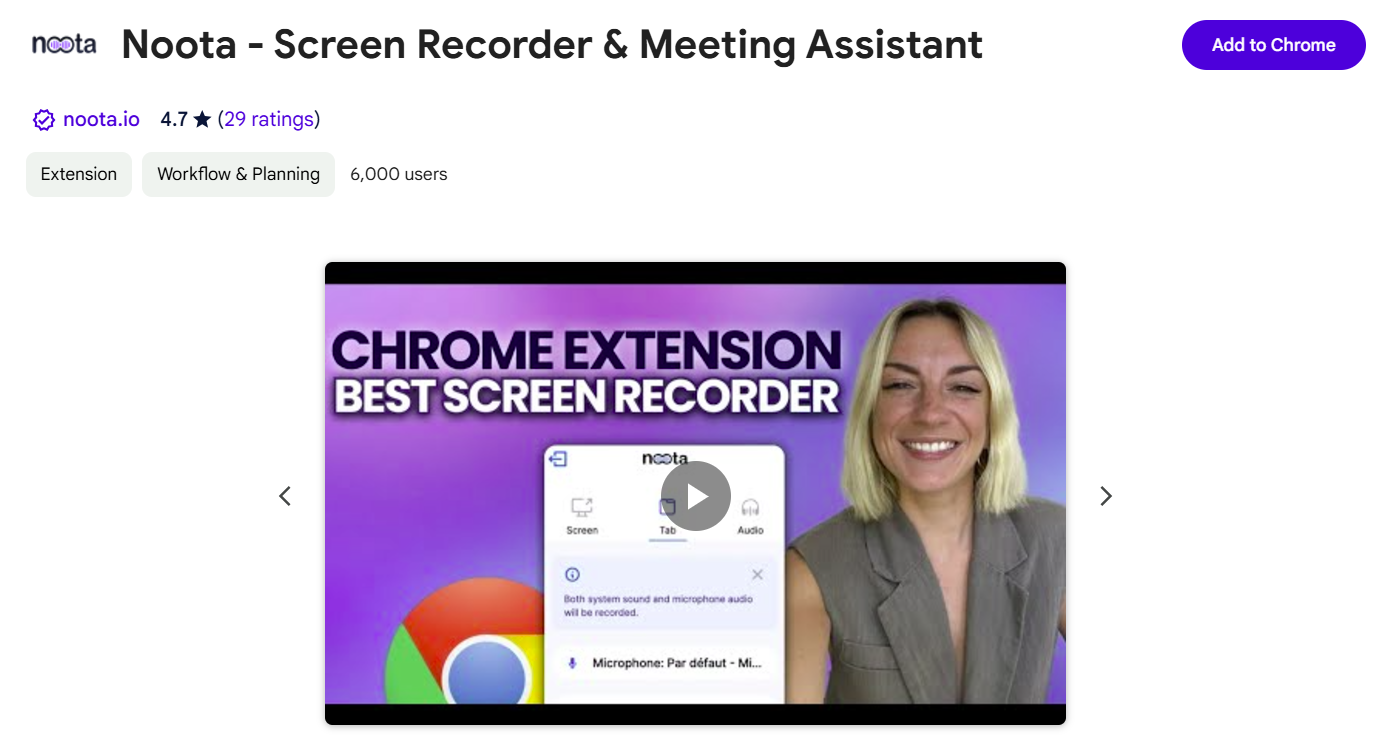
If you want a seamless, hassle-free way to record your Webex meetings, the Noota extension is the best solution.
To use the Noota Screen Recorder, follow these steps:
- Simply add the Noota extension to your browser. It works with popular browsers like Chrome, Edge, etc.
- Once you've installed the extension, open Webex and join the meeting you wish to record.
- Click on the Noota extension icon in your browser to start recording. It's that simple.
4. Using Built-in Screen Recording Feature (for Phones)
Want to record Webex sessions on the go? In that scenario, you can utilize the built-in screen recording features of your mobile phone.
On iPhone:
- Go to Settings > Control Center and add "Screen Recording" to your shortcuts.
- Open the Webex app and start your meeting.
- Swipe down from the top-right corner and tap the “Record” button.
After a three-second countdown, the recording will begin.
On Android:
- Ensure screen recording is enabled by swiping down from the top of your screen. If it’s not visible, tap the "Pencil" icon to add it.
- Start your Webex meeting.
- Swipe down again and tap the “Screen Record” icon to begin capturing the meeting.
Finding Webex Recordings on Computer
Accessing your Webex recordings is straightforward. Here's how you can do it:
For Cloud Recordings:
- Sign in: Log in to your Webex account.
- Navigate to Recordings: Click on the "Recordings" tab in the navigation panel.
- Locate your recording: Browse through the list to find the meeting recording you wish to access.
Remember, it may take up to 24 hours for your recording to become available, depending on file size and bandwidth.
For Local Recordings:
- Windows users: Your recordings are typically saved in the "Documents" folder.
- Mac users: Look for your recordings in the "Home" folder using Finder.
These are the default save locations, but you can choose a different path when saving your recordings.
Finding Webex Recordings on Mobile
To access Webex recordings on your smartphone, follow these steps:
- Open the app: Launch the Webex App on your device.
- Go to Meetings: Tap on the "Meetings" tab.
- Select Recordings: Choose "Recordings" to view a list of all available recordings.
- View recording: Tap directly on a recording to open and view it.
Supercharge Your Webex Meetings with Noota

Recording a Webex meeting isn’t enough! You need clear, actionable transcripts to ensure no crucial information is missed, facilitate effective follow-ups, and improve overall collaboration. That’s where Noota AI steps in! Here’s how it can help:
- Real-Time Transcription: With Noota, you don’t have to wait for post-meeting processing. It transcribes your Webex meetings in real time, allowing you to capture key moments as they happen. This ensures every detail is documented accurately and instantly, even in fast-paced discussions.
- Highlight Key Moments: Noota enables you to highlight key moments in the transcript—whether it’s an action item, decision, or important discussion. This makes it easy to revisit and follow up on critical points, saving time and ensuring nothing is overlooked.
- Export and Sharing: Noota supports the export of transcripts and summaries in various formats, facilitating easy sharing with colleagues or students. This functionality ensures that critical information is distributed effectively within teams.
- Seamless Tool Integration: Noota integrates with tools you already use, such as Slack, Trello, and Google Drive. This allows you to send transcripts or key takeaways directly to your workflow, enhancing efficiency.
Ready to make your Webex meetings more productive with accurate, actionable transcripts? Try Noota for free!
Frequently Asked Questions - (FAQs)
Can I download a Webex meeting recording?
Yes, once the recording is available, you can download it from the "My Recordings" section in your Webex account. Recordings are usually available in MP4 format for easy access and sharing.
Is there a time limit for Webex meeting recordings?
Webex cloud recording allows for up to 24 hours of recording time. If you exceed this, the recording will automatically stop, and a new recording session will begin. Local recordings are limited by your storage capacity.
How do I record audio only in Webex?
To record audio only in Webex, start a meeting and click on the "Record" button. In the recording options, choose "Record on this computer." This will capture audio and exclude video. After the meeting, you'll find an audio-only file saved locally, which can be shared or stored as needed.
.webp)

.svg)
