.png)
.svg)
.svg)
You record back‑to‑back Zoom calls and end up with a pile of meeting files.
This guide shows you exactly where Zoom stores your recordings—both in the cloud and on your compute, how to download them for safekeeping and delete the ones you no longer need.
You’ll also see when recordings expire, how to fix common hiccups, and how Noota’s AI can turn every Zoom file into searchable, shareable insights.
Where Zoom Recordings Are Located
Zoom gives you two storage options—cloud and local—depending on your plan and settings.
Cloud Recordings
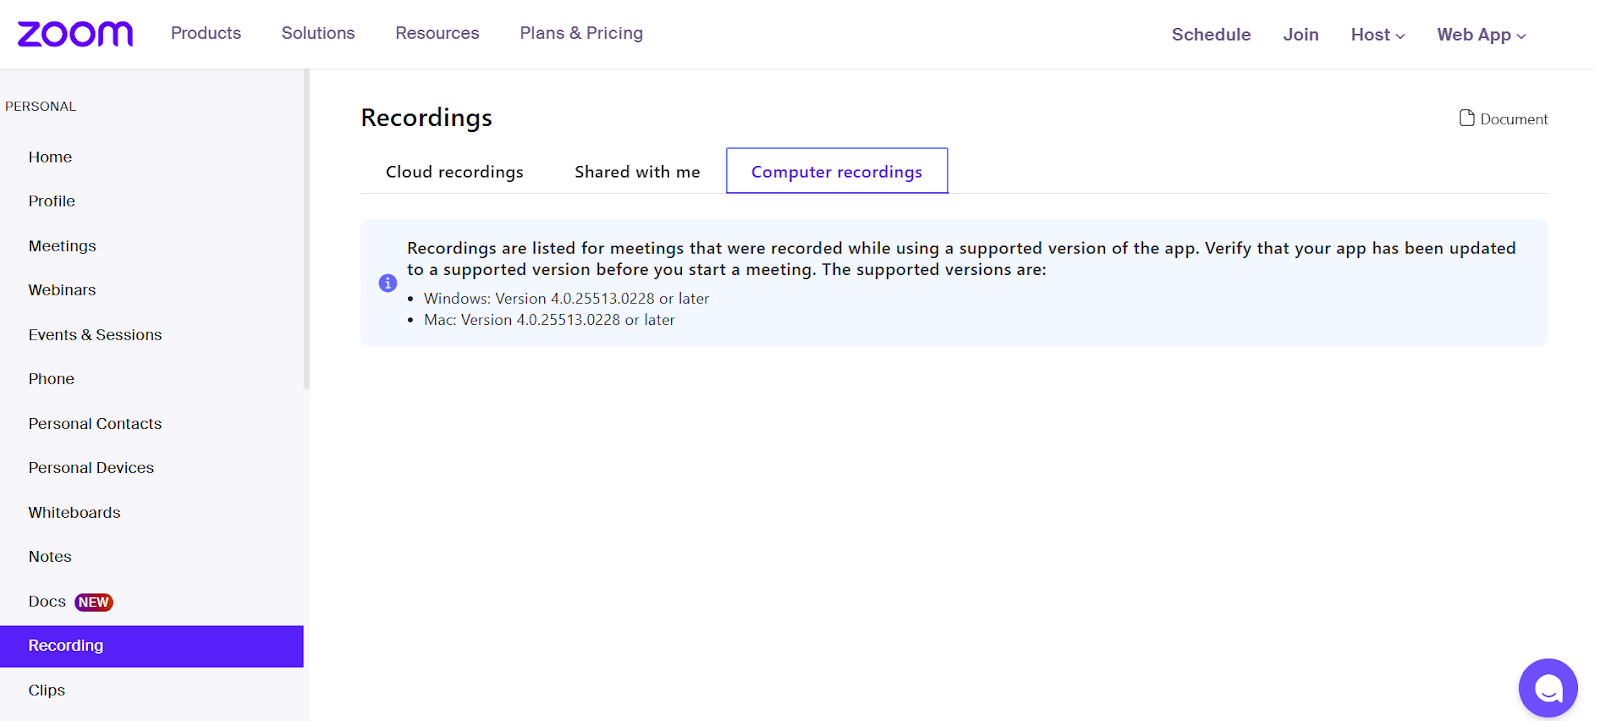
If you’re on a paid plan, Zoom can save your recordings to the cloud. You don’t use up local hard drive space, and you can reach them from any browser. Paid subscribers see a Recordings tab in their Zoom web portal where all cloud files—video, audio, and chat—are listed and ready to stream or download.
To view cloud recordings, sign in at zoom.us, click Recordings in the left sidebar, then select Cloud Recordings. You’ll see every session you recorded to the cloud, organized by date and meeting topic. Click Download on the video, audio, or transcript file to save a local copyI.
Local Recordings
If you record locally—or if you’re on a free plan—Zoom saves files directly to your computer. By default, recordings land in a Zoom folder inside your Documents directory. Each meeting gets its own subfolder named after the date and topic.
- Windows:
C:\Users\[YourName]\Documents\Zoom - macOS:
/Users/[YourName]/Documents/Zoom - Linux:
/home/[YourName]/Documents/Zoom
You can change this default location anytime. Open the Zoom desktop app, click your profile picture, choose Settings → Recording, then click Change next to “Store my recordings at” and pick a new folder.
Accessing Local Files in Zoom
Zoom’s desktop client also lists your local recordings under Meetings → Recorded. Click Open next to any session to jump straight to its folder in your file system.
Tip: If you can’t find a recording, double‑check whether you recorded to the cloud or locally. Mixing up the two is the most common cause of “missing” files.
How to Download Zoom Recordings

You record to the cloud or locally. Downloading them takes just a few clicks.
Cloud Recordings via Web Portal
- Sign in to the Zoom web portal at zoom.us.
- Click Recordings in the left sidebar, then choose Cloud Recordings.
- Find your meeting and click its topic to open the recording details.
- Hover over the file you want—video, audio, or transcript—and click the Download arrow.
Downloading Transcripts
• After opening the recording details, hover over Audio transcript and click Download.
• Transcripts save as .vtt files you can open in any text editor or import into captioning tools.
Using Shared Link
• If you receive a shared recording link, open it in your browser.
• Click the Download icon in the player controls to save the MP4 locally.
Bulk or Automated Downloads
• For multiple recordings, use tools like Tactiq’s bulk‑download guide.
• These methods let you script downloads via Zoom’s API or browser automation.
Local Recordings on Your Computer
- Open the Zoom desktop app and go to Meetings → Recorded.
- Click Open next to any session to jump to its folder in your file system.
- Copy the MP4 and M4A files from the default Documents/Zoom folder to wherever you need them.
Permissions & Processing Tips
• Only hosts and co‑hosts can download cloud recordings. Confirm you have the right role.
• If a recording shows “Processing,” wait a few minutes and refresh the page. Large files take longer to prepare.
• For faster downloads, choose the highest‑quality MP4 and grab the separate audio file only if you need it.
How to Delete Zoom Recordings
You clear out old recordings to free up space and protect sensitive info. Zoom lets you delete both cloud and local files in minutes.
Cloud Deletion via Web Portal
- Sign in to zoom.us and click Recordings in the left sidebar.
- Select Cloud Recordings and find the meeting you want to remove.
- Check the box beside the session, then click Delete and confirm.
- Deleted recordings move to a trash folder. Empty that folder to free storage immediately.
Local Deletion on Your Computer
- Open your file explorer and navigate to the Zoom folder in Documents (or your custom path).
- Inside, locate the subfolder for the meeting date and topic.
- Select the MP4, M4A, and chat text files you no longer need.
- Press Delete and then empty your recycle bin or Trash to remove them permanently.
Using the Zoom Desktop Client
- Launch the Zoom app and go to Meetings → Recorded.
- Find the session and click Open to view its folder.
- Right‑click the recording and choose Delete. Confirm when prompted.
Auto‑Delete Settings for Cloud Recordings
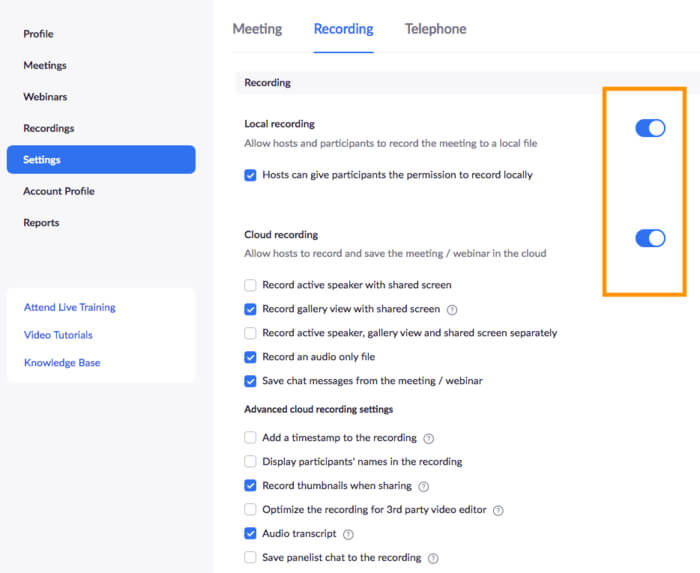
You can set recordings to expire automatically. Go to Account Settings → Recording tab in the web portal.
Under Automatic Recording Deletion, pick your preferred retention period (e.g., 7, 30, 60 days).
Save your changes. Zoom will then purge cloud files once they hit the age limit.
When Do Zoom Recordings Expire?
You record meetings to the cloud or locally. You need to know how long those files stick around before they vanish.
Cloud vs. Local
Cloud recordings live on Zoom’s servers and may expire. Local recordings live on your hard drive and never auto‑expire.
Free Plan Retention
If you ever record to the cloud on a free Basic plan, Zoom deletes those files after 30 days. You’ll lose access unless you download them first.
Paid Plan Retention
With a paid Pro, Business, Education, or Enterprise license, recordings remain until you delete them or change your settings. There is no default 30‑day drop for paid users.
Admin Auto‑Delete Settings
Account owners and admins can enforce auto‑deletion periods. You choose anywhere from days to months before cloud files move to trash. Some organizations set a 150‑day retention rule. After 150 days, recordings go to Zoom’s trash folder for an extra 30 days before permanent deletion.
Trash Folder Grace Period
Once in the trash, you have 30 days to recover files. After that, recordings disappear for good. You must restore them from Recordings → Trash in the web portal.
Checking Your Settings
To see or change retention rules, sign in at zoom.us and go to Account Settings → Recording → Automatic Recording Deletion. There you pick your auto‑delete window or disable it entirely.
Zoom Recording Troubleshooting
When local recordings fail to convert, Zoom may be stuck on an earlier conversion job. You’ll see “Failed to convert recording – another conversion in progress” under Meetings > Recorded. Restart the desktop client and try Convert again. If that doesn’t help, reinstall Zoom or move old recording files out of your Zoom folder before converting.
If you can’t find a cloud recording, verify both Cloud and Local locations. Sign in at zoom.us/recording and check Cloud Recordings. Then open your Zoom folder in Documents to see local files. Mixing up cloud and local storage is the most common cause of “missing” recordings.
No audio on your MP4? Some players can’t decode Zoom’s audio codec. Open the file in VLC or another player. You can also locate the separate .m4a audio file in your recording folder and play it directly.
Seeing “You cannot download this recording. No permission”? That means you lack host or admin rights. Confirm you’re signed in as the meeting host or have delegate access under Account Management > Recording Management. Adjust sharing settings to “Anyone with the link” if needed.
If a cloud recording stays in Processing for hours, large files can take up to twice their duration to finish. Wait at least 24–72 hours. If it’s still stuck after three days, submit a Zoom support ticket for assistance.
Corrupt files can block playback or downloads. Re‑download from the cloud portal rather than using local copies. If you hit timeouts or hung dialogs in Chrome, clear site permissions under Settings > Privacy & security > Site Settings and retry.
Always check your role and settings before troubleshooting. Hosts and co‑hosts can delete or download recordings. Participants need explicit permission. Adjust your account’s Recording settings to ensure you have the right retention and access rules.
AI Zoom Knowledge Base: Noota
You record important Zoom meetings but still hunt for key insights later. Noota turns every call into searchable, shareable knowledge so you never miss a moment.
Main Features
- Real‑Time Recording & Transcription: Captures audio and speaker names from Zoom meetings instantly.
- AI‑Generated Summaries: Delivers concise overviews of decisions, next steps, and topics covered.
- Multi‑Language Support: Transcribes in over 50 languages and dialects for global teams.
- Searchable Knowledge Base: Store, search, and retrieve any past meeting in seconds.
- CRM & ATS Integrations: Push summaries directly to Salesforce, HubSpot, BullHorn, or your ATS.
- One‑Click Sharing: Send transcripts, summaries, or clips via email, Slack, or your project tools.
Pros
- Keeps you present in meetings by removing the need for manual note‑taking.
- Ensures no detail slips through the cracks with real‑time capture and search.
- Empowers global collaboration with extensive language coverage.
- Integrates deeply into your workflow—no app switching needed.
Cons
- Requires installing a browser extension or bot and granting recording permissions.
- Some organizations may need admin approval before deployment.
- Premium analytics and custom summaries sit behind higher‑tier plans.
- Transcription accuracy can dip in poor‑audio or multi‑speaker scenarios.
Want to have a dynamic knowledge base of all your Zoom meetings ? Try Noota for free.
.webp)


.svg)
