.png)
.svg)
.svg)
.svg)
If you're using an iPhone, call recording isn’t always straightforward.
Depending on your region and iOS version, the feature might not even be available.
In this guide, you’ll learn how to use Apple’s built-in iPhone call recording and external tools.
Do iPhones Includes Native Recording Features ?
Yes, iOS does include built-in recording features. With iOS 18.1, Apple finally introduced native call recording.
Now, you can record calls directly from the Phone app—no extra tools required.
But the feature is not available in all countries, due to legal restrictions on call recording.
If you don’t see it, check your region’s laws or contact Apple support.
Also, older iPhone models may not support call recording, even if they run iOS 18.1. The feature is optimized for newer devices.
Both parties on the call will always be notified when recording starts. Apple built this in to ensure transparency and legal safety.
How to Record an iPhone Call with Built-In Features
It's simple, fast, and built into your iPhone.
Here’s how to do it step by step.
Step 1: Make Sure You’re on iOS 18.1 or Later
Call recording is only available on iPhones running iOS 18.1 or newer.
To check your version, go to Settings > General > About.
If you’re on an earlier version, update your iOS to unlock this feature.
Step 2: Start or Answer a Call
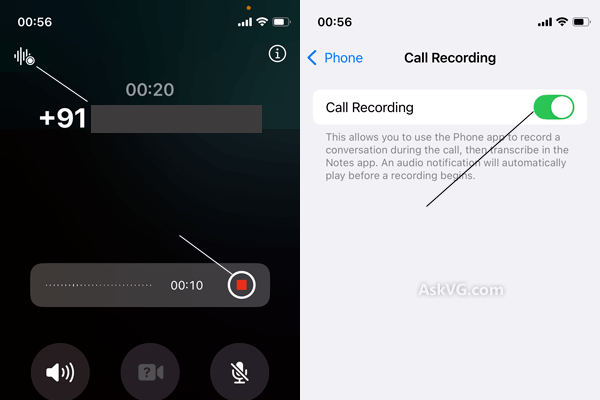
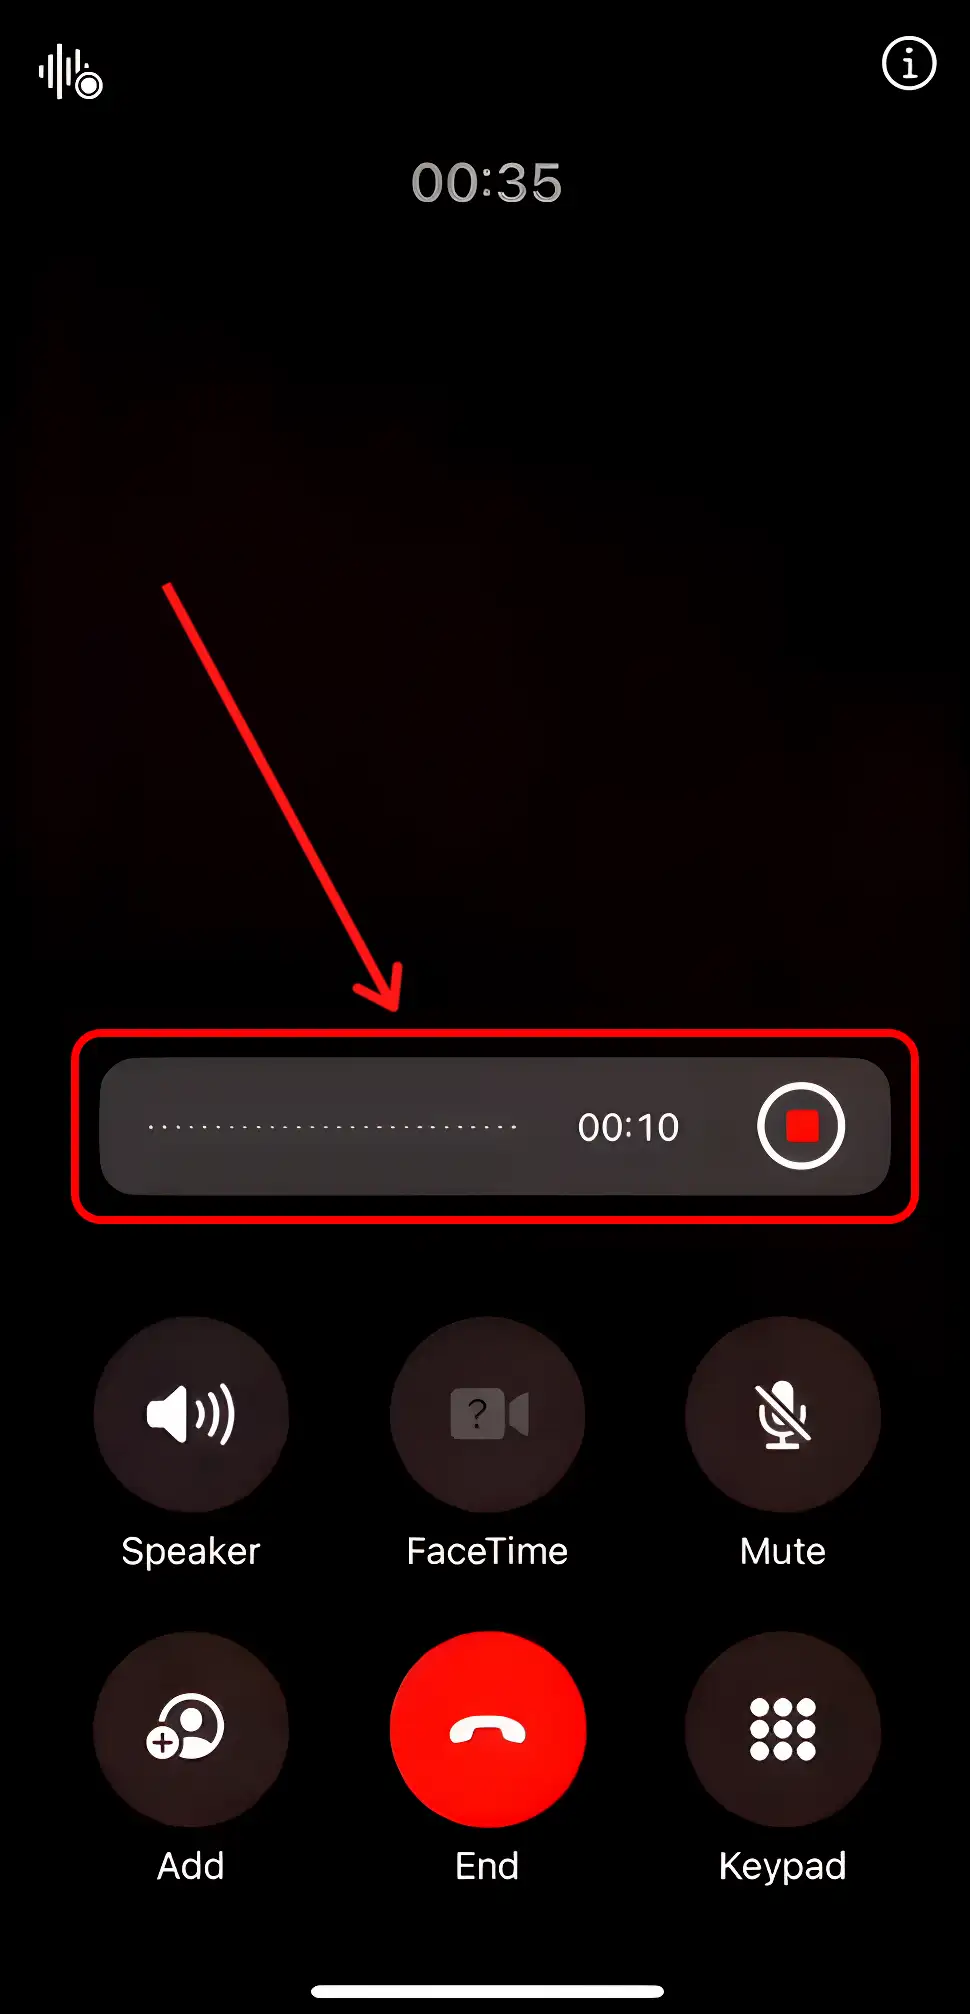
Once you're on a call, you’ll see a Record button on the screen.
Tap it to start recording.
You’ll hear a short beep, and the person on the other end will be notified that the call is being recorded. This is automatic—you can’t disable the notification, as it’s required in many regions for legal compliance.
Step 3: Stop Recording When You’re Done
Tap the Record button again to stop.
Your iPhone will save the file automatically.
Step 4: Access the Recording
All your recorded calls are stored in the Notes app.
Apple creates a new note with the audio file attached. If supported in your region, you’ll also see a full transcription of the call.
You can search by contact, date, or keyword—so finding the right conversation later is quick and easy.
iPhone Call Recording Troubleshooting
Trying to record a call on your iPhone and it’s not working? You’re not alone.
Apple’s built-in call recording feature is new—and not always available by default. Whether you're missing the record button or can't access your saved calls, here’s how to troubleshoot step by step.
1. You Don’t See the Record Button
First, check your iOS version.
Go to Settings > General > About and look at the software version. You need to be on iOS 18.1 or later. If not, update your device.
Still no button? It might be a regional restriction.
Call recording isn’t available in every country. Some governments restrict it for legal reasons, and Apple follows those rules. If you’re in a region where recording is blocked, the feature simply won’t appear—no matter what version you’re on.
Solution: Check Apple's support page to confirm availability in your region. If it’s restricted, you’ll need to use a third-party tool like Noota Call.
2. You Updated Your Phone, But It Still Doesn’t Work
Even with the latest iOS, some older iPhone models don’t support call recording.
Apple hasn’t made an official list, but newer models (iPhone 14 and up) are more likely to support the feature. If you're on an iPhone 11 or older, the feature may not work—even after an update.
3. The Call Records, But You Can’t Find It
Recordings are saved in the Notes app, not the Phone app.
Go to Notes, and search for your contact’s name or the date of the call. If transcription is supported in your region, you’ll see both the audio and the written transcript.
Still missing? Make sure you saved the call before hanging up. If the call ended unexpectedly, the recording may not have been saved.
4. You Can't Hear the Other Person in the Recording
Apple's recording feature captures both sides of the conversation—but only when the system detects a stable connection.
If the other person’s voice is missing or faint, it may be due to network issues or a Bluetooth audio setup interfering with the call. Try switching to regular audio (no AirPods or speakerphone) during the recording.
How to Record & Transcribe an iPhone Call with a Third-Party Tool
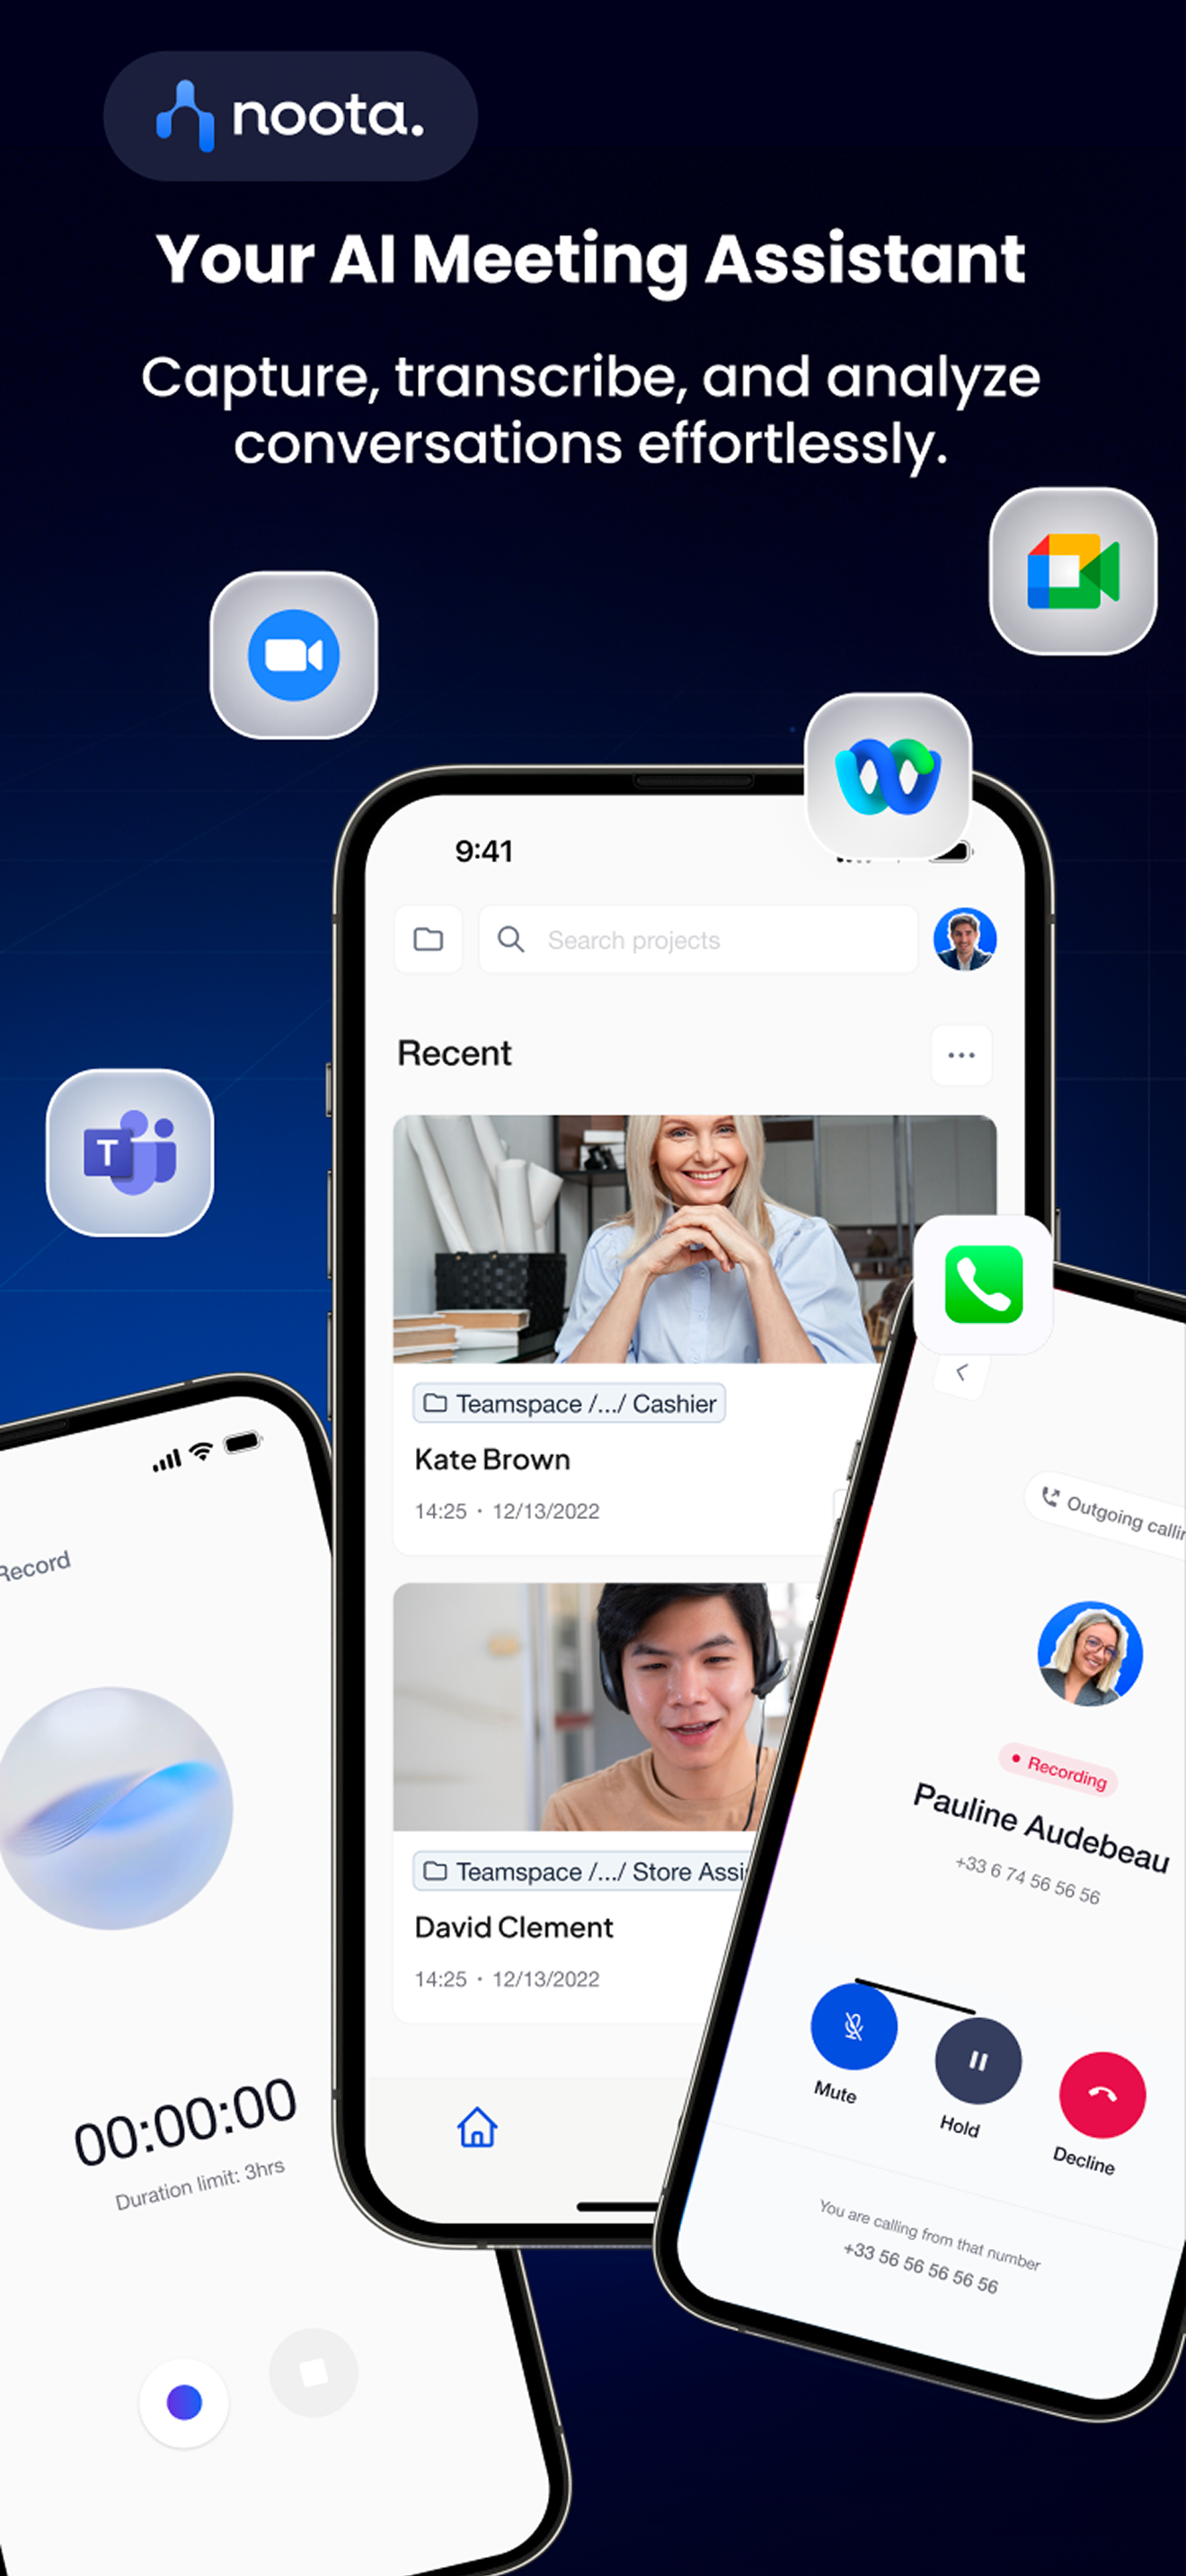
If you need more than just a simple recording, Apple’s built-in tool probably isn’t enough. That’s where third-party tools come in—and Noota Call is built specifically for professionals like you :
- Click, Talk, Capture : With Noota Call, recording and transcribing your calls is effortless. There’s no manual setup, no need to upload audio after the fact. Just start the call, and Noota does the rest.You can call directly from the Noota app or use the browser extension. As soon as the call begins, it’s automatically recorded and transcribed in real time.
- Instant Transcriptions and Summaries : Once the call ends, you get a clean transcript and an AI-generated summary. The summary highlights: You can quickly review, share, or copy it into an email or task list. No rewatching. No note-taking.
- Smart Number Detection : See a phone number online—on LinkedIn, a CRM, or a website? Just click it. Noota detects the number and lets you call it in one click from your browser.
- Built-In CRM & ATS Sync : After every call, Noota can automatically update your tools. Whether you use HubSpot, Salesforce, Notion, or an ATS, the summary and notes are pushed to the right place—without manual entry.
Want to get the most data from your iPhone calls ? Try Noota for free.
.webp)


.svg)
